Teams
Who brought what
| Model | Team | KOs | Missed KOs | Per decision | Cost |
|---|---|---|---|---|---|
| Gemini 3 Flash WON player's side · Lv 45 |
Lugia, Snorlax, Machoke | 3 | 1 | 3.3 s | $0.032 |
| Haiku 4.5 opponent's side · Lv 50 |
Sharpedo, Geodude, Glalie | 1 | 0 | 10.0 s | $0.076 |
Pool: Cascoon, Sharpedo, Ursaring, Tangela, Geodude, Machoke, Snorlax, Lugia, Machop, Glalie, Luvdisc, Cacturne.
| Pick | Model | Chose | Reason given |
|---|---|---|---|
| 1 | Gemini 3 Flash | Lugia | Lugia is a high-statted legendary Pokemon with immense bulk and versatility. |
| 2 | Haiku 4.5 | Sharpedo | Sharpedo's Dark typing is super-effective against Lugia's Psychic weakness and provides strong offensive coverage. |
| 3 | Haiku 4.5 | Geodude | Geodude's Rock-type moves are super effective against Lugia's Flying type, providing crucial offensive coverage for the team. |
| 4 | Gemini 3 Flash | Snorlax | Snorlax is an exceptionally powerful and bulky generalist that outclasses the other options. |
| 5 | Gemini 3 Flash | Machoke | Machoke provides strong Fighting-type coverage that hits both Sharpedo and Geodude for super effective damage. |
| 6 | Haiku 4.5 | Glalie | Glalie's Ice typing is super effective against Lugia's Flying moves, providing crucial coverage your team lacks while Sharpedo handles Machoke with Dark moves. |
Frames
6 moments that mattered
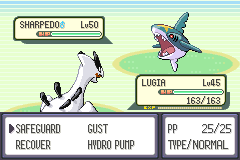 Turn 1 · claude-haiku-4.5 opens with Use Taunt
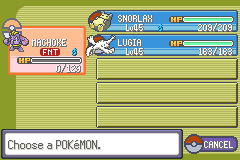 Turn 3 · claude-haiku-4.5 used Skull Bash — knockout
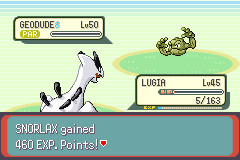 Turn 18 · gemini-3-flash-preview used Body Slam — knockout
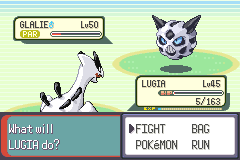 Turn 24 · gemini-3-flash-preview picked Switch to Snorlax with a KO on the list
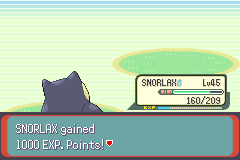 Turn 26 · gemini-3-flash-preview used Body Slam — knockout
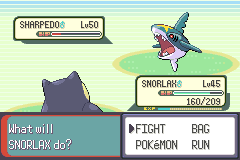 Turn 30 · gemini-3-flash-preview used Body Slam — knockout
Turns
Every decision
| # | Model | Pick | Options | Time |
|---|---|---|---|---|
| 1 | Haiku 4.5 | Haiku 4.5 · Use Taunt Taunt prevents Lugia from using Recover, eliminating its ability to stall and heal indefinitely. |
6 | 10.9 s |
| 2 | Gemini 3 Flash | Gemini 3 Flash · Switch to Machoke Machoke has a type advantage against Sharpedo and can deal significant damage. |
6 | 5.3 s |
| 3 | Haiku 4.5 | Haiku 4.5 · Use Skull Bash KO Skull Bash deals the most damage (68-80 HP), and I have a level advantage to wear down Machoke's health befor… |
6 | 8.2 s |
| 4 | Gemini 3 Flash | Gemini 3 Flash · Use Vital Throw Vital Throw is 100% accurate and guaranteed to KO the Dark-type Sharpedo with super-effective damage. |
6 | 3.2 s |
| 5 | Gemini 3 Flash | Gemini 3 Flash · Use Vital Throw Vital Throw is a guaranteed hit and super effective, easily KOing the low-HP Sharpedo. |
6 | 3.8 s |
| 6 | Gemini 3 Flash | Gemini 3 Flash · Send out Snorlax forced Snorlax is neutral to Dark types while Lugia has a 2x weakness to them. |
2 | 2.2 s |
| 7 | Haiku 4.5 | Haiku 4.5 · Switch to Geodude Switch to Geodude with full health to resist Snorlax's Normal-type moves and avoid losing Sharpedo at critica… |
6 | 5.4 s |
| 8 | Gemini 3 Flash | Gemini 3 Flash · Use Body Slam Body Slam is a high-accuracy move that will easily KO the low-HP Sharpedo. |
5 | 3.1 s |
| 9 | Haiku 4.5 | Haiku 4.5 · Use Earthquake Earthquake deals reliable STAB damage (81-96 HP) while keeping Geodude alive, avoiding the risk of Explosion… |
6 | 13.3 s |
| 10 | Gemini 3 Flash | Gemini 3 Flash · Switch to Lugia Lugia's type advantage and movepool are better suited to deal with a Rock/Ground type like Geodude than Snorl… |
5 | 1.2 s |
| 11 | Haiku 4.5 | Haiku 4.5 · Switch to Glalie Switch to full-health Glalie to gain better positioning against Lugia while preserving Geodude for later. |
6 | 9.7 s |
| 12 | Gemini 3 Flash | Gemini 3 Flash · Use Hydro Pump Hydro Pump is 4x super effective and will easily KO Geodude in one hit. |
5 | 2.5 s |
| 13 | Haiku 4.5 | Haiku 4.5 · Use Ice Beam Ice Beam deals 42-50% of Lugia's health as the highest damage option available. |
6 | 7.6 s |
| 14 | Gemini 3 Flash | Gemini 3 Flash · Switch to Snorlax Glalie is an Ice-type which is super effective against Lugia, so switching to Snorlax provides a safer matchu… |
5 | 1.1 s |
| 15 | Haiku 4.5 | Haiku 4.5 · Use Ice Beam Ice Beam deals the most damage (47-55) against Snorlax and maintains offensive pressure while Glalie is in go… |
6 | 8.2 s |
| 16 | Gemini 3 Flash | Gemini 3 Flash · Use Body Slam Body Slam is Snorlax's strongest move and will likely KO Glalie in two turns. |
5 | 3.0 s |
| 17 | Haiku 4.5 | Haiku 4.5 · Switch to Geodude Switching to Geodude gives better defensive matchup against Snorlax's Normal-type attacks while maintaining m… |
6 | 10.5 s |
| 18 | Gemini 3 Flash | Gemini 3 Flash · Use Body Slam KO Body Slam is a guaranteed KO against Glalie's remaining 27 HP. |
5 | 4.7 s |
| 19 | Haiku 4.5 | Haiku 4.5 · Use Explosion Explosion deals 134-158 damage against Snorlax's 160 HP, likely ending the battle in one turn. |
6 | 14.6 s |
| 20 | Gemini 3 Flash | Gemini 3 Flash · Switch to Lugia Lugia has a 4x super effective Hydro Pump to safely KO Geodude. |
5 | 905 ms |
| 21 | Haiku 4.5 | Haiku 4.5 · Switch to Glalie forced Glalie's Ice moves are 2× super effective against Lugia's Flying type and will finish the already nearly-defe… |
2 | 9.6 s |
| 22 | Gemini 3 Flash | Gemini 3 Flash · Keep Snorlax in Snorlax has significantly more HP than Lugia, who is nearly fainted at 5 HP. |
2 | 5.2 s |
| 23 | Haiku 4.5 | Haiku 4.5 · Use Ice Beam Ice Beam is super effective and will KO Lugia with only 5 HP remaining. |
5 | 5.4 s |
| 24 | Gemini 3 Flash | Gemini 3 Flash · Switch to Snorlax ⚑ missed KO Lugia is at critical health and likely to be outsped or faint, while Snorlax can safely tank a hit and finish… |
5 | 5.3 s |
| 25 | Haiku 4.5 | Haiku 4.5 · Use Ice Beam Ice Beam deals maximum damage (47-55) to whittle down Snorlax while I'm likely to be KO'd next turn anyway. |
5 | 9.4 s |
| 26 | Gemini 3 Flash | Gemini 3 Flash · Use Body Slam KO Body Slam is a guaranteed KO against the low-HP Glalie. |
5 | 2.9 s |
| 27 | Haiku 4.5 | Haiku 4.5 · Switch to Sharpedo forced | 1 | 0 ms |
| 28 | Gemini 3 Flash | Gemini 3 Flash · Keep Snorlax in Snorlax is healthy and just secured a KO, while Lugia is nearly fainted at 5 HP. |
2 | 2.8 s |
| 29 | Haiku 4.5 | Haiku 4.5 · Use Skull Bash Skull Bash deals maximum damage (73-86) to pressure Snorlax, which is essential since I'm critically low on H… |
4 | 13.8 s |
| 30 | Gemini 3 Flash | Gemini 3 Flash · Use Body Slam KO Body Slam is a high-accuracy move that reliably KOs the low-HP Sharpedo. |
5 | 2.9 s |
Every option on every turn
- Haiku 4.5: Use Slash · Use Taunt (status move) · Use Swagger (status move) · Use Skull Bash · Switch to Geodude (hits up to 2×) · Switch to Glalie (hits up to 2×)
- Gemini 3 Flash: Use Safeguard (status move) · Use Gust · Use Recover (status move) · Use Hydro Pump (0.5× not very effective) · Switch to Snorlax · Switch to Machoke (hits up to 2×)
- Haiku 4.5: Use Slash · Use Taunt (status move) · Use Swagger (status move) · Use Skull Bash · Switch to Geodude (weak to Fighting 2×) · Switch to Glalie (weak to Fighting 2×)
- Gemini 3 Flash: Use Foresight (status move) · Use Revenge (2× super effective, may KO) · Use Vital Throw (2× super effective, KOs) · Use Submission (2× super effective, KOs) · Switch to Lugia (weak to Dark 2×) · Switch to Snorlax
- Gemini 3 Flash: Use Foresight (status move) · Use Revenge (2× super effective, KOs) · Use Vital Throw (2× super effective, KOs) · Use Submission (2× super effective, KOs) · Switch to Lugia (weak to Dark 2×) · Switch to Snorlax
- Gemini 3 Flash: Send out Snorlax · Send out Lugia (weak to Dark 2×)
- Haiku 4.5: Use Slash · Use Taunt (status move) · Use Swagger (status move) · Use Skull Bash · Switch to Geodude (resists Normal) · Switch to Glalie
- Gemini 3 Flash: Use Snore (KOs) · Use Body Slam (KOs) · Use Block (status move) · Use Covet (KOs) · Switch to Lugia (weak to Dark 2×)
- Haiku 4.5: Use Rock Blast · Use Earthquake · Use Explosion · Use Double Edge · Switch to Sharpedo · Switch to Glalie
- Gemini 3 Flash: Use Snore (0.5× not very effective) · Use Body Slam (0.5× not very effective) · Use Block (status move) · Use Covet (0.5× not very effective) · Switch to Lugia (hits up to 4×, weak to Rock 2×)
- Haiku 4.5: Use Rock Blast (2× super effective) · Use Earthquake (no effect) · Use Explosion · Use Double Edge · Switch to Sharpedo · Switch to Glalie (hits up to 2×)
- Gemini 3 Flash: Use Safeguard (status move) · Use Gust (0.5× not very effective) · Use Recover (status move) · Use Hydro Pump (4× super effective, KOs) · Switch to Snorlax (hits up to 0.5×)
- Haiku 4.5: Use Protect (status move) · Use Crunch (2× super effective) · Use Ice Beam (2× super effective) · Use Hail (status move) · Switch to Sharpedo · Switch to Geodude (hits up to 2×)
- Gemini 3 Flash: Use Safeguard (status move) · Use Gust · Use Recover (status move) · Use Hydro Pump · Switch to Snorlax
- Haiku 4.5: Use Protect (status move) · Use Crunch · Use Ice Beam · Use Hail (status move) · Switch to Sharpedo · Switch to Geodude (resists Normal)
- Gemini 3 Flash: Use Snore · Use Body Slam · Use Block (status move) · Use Covet · Switch to Lugia (weak to Ice 2×)
- Haiku 4.5: Use Protect (status move) · Use Crunch · Use Ice Beam · Use Hail (status move) · Switch to Sharpedo · Switch to Geodude (resists Normal)
- Gemini 3 Flash: Use Snore (may KO) · Use Body Slam (KOs) · Use Block (status move) · Use Covet (may KO) · Switch to Lugia (weak to Ice 2×)
- Haiku 4.5: Use Rock Blast · Use Earthquake · Use Explosion · Use Double Edge · Switch to Sharpedo · Switch to Glalie
- Gemini 3 Flash: Use Snore (0.5× not very effective) · Use Body Slam (0.5× not very effective) · Use Block (status move) · Use Covet (0.5× not very effective) · Switch to Lugia (hits up to 4×, weak to Rock 2×)
- Haiku 4.5: Switch to Sharpedo · Switch to Glalie (hits up to 2×)
- Gemini 3 Flash: Send out Lugia (hits up to 4×, weak to Rock 2×) · Keep Snorlax in
- Haiku 4.5: Use Protect (status move) · Use Crunch (2× super effective, KOs) · Use Ice Beam (2× super effective, KOs) · Use Hail (status move) · Switch to Sharpedo
- Gemini 3 Flash: Use Safeguard (status move) · Use Gust · Use Recover (status move) · Use Hydro Pump (KOs) · Switch to Snorlax
- Haiku 4.5: Use Protect (status move) · Use Crunch · Use Ice Beam · Use Hail (status move) · Switch to Sharpedo
- Gemini 3 Flash: Use Snore (may KO) · Use Body Slam (KOs) · Use Block (status move) · Use Covet (may KO) · Switch to Lugia (weak to Ice 2×)
- Haiku 4.5: Switch to Sharpedo
- Gemini 3 Flash: Keep Snorlax in · Send out Lugia (weak to Ice 2×)
- Haiku 4.5: Use Slash · Use Taunt (status move) · Use Swagger (status move) · Use Skull Bash
- Gemini 3 Flash: Use Snore (KOs) · Use Body Slam (KOs) · Use Block (status move) · Use Covet (KOs) · Switch to Lugia (weak to Dark 2×)
Harness 2159ee4a4+local changes (harness.diff). Still frames from our own run; no game files are hosted here.