Teams
Who brought what
| Model | Team | KOs | Missed KOs | Per decision | Cost |
|---|---|---|---|---|---|
| Gemini 3 Flash opponent's side · Lv 45 |
Lugia, Machoke, Sharpedo | 2 | 0 | 3.9 s | $0.047 |
| Haiku 4.5 WON player's side · Lv 50 |
Snorlax, Geodude, Glalie | 3 | 0 | 7.9 s | $0.093 |
Pool: Cascoon, Sharpedo, Ursaring, Tangela, Geodude, Machoke, Snorlax, Lugia, Machop, Glalie, Luvdisc, Cacturne.
| Pick | Model | Chose | Reason given |
|---|---|---|---|
| 1 | Haiku 4.5 | Snorlax | Snorlax is the strongest generalist pick with excellent bulk and coverage to form a solid team foundation. |
| 2 | Gemini 3 Flash | Lugia | Lugia is a legendary with massive stats that can easily outlast and overpower a Snorlax. |
| 3 | Gemini 3 Flash | Machoke | Machoke is a strong Fighting-type that provides a direct super-effective counter to Snorlax. |
| 4 | Haiku 4.5 | Geodude | Geodude provides Rock-type coverage for super-effective damage against Lugia while Ground typing gives solid defensive utility against both opponents. |
| 5 | Haiku 4.5 | Glalie | Glalie's Ice typing is super-effective against Lugia's Flying, covering the team's weakness while Snorlax and Geodude handle Machoke. |
| 6 | Gemini 3 Flash | Sharpedo | Sharpedo provides a strong Water-type advantage against Geodude and high offensive pressure to complement Lugia and Machoke. |
Frames
6 moments that mattered
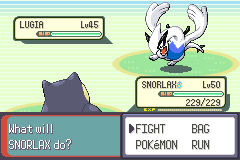 Turn 1 · gemini-3-flash-preview opens with Switch to Machoke
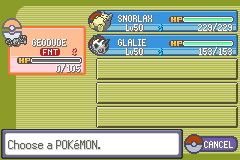 Turn 3 · gemini-3-flash-preview used Submission — knockout
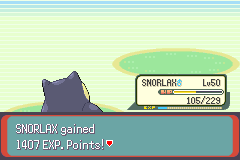 Turn 9 · claude-haiku-4.5 used Body Slam — knockout
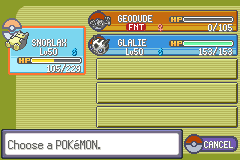 Turn 8 · gemini-3-flash-preview used Submission — knockout
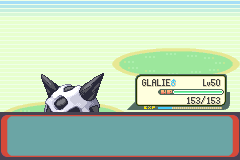 Turn 17 · claude-haiku-4.5 used Ice Beam — knockout
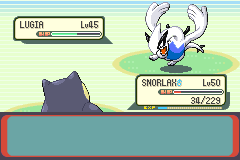 Turn 39 · claude-haiku-4.5 used Rollout — knockout
Turns
Every decision
| # | Model | Pick | Options | Time |
|---|---|---|---|---|
| 1 | Gemini 3 Flash | Gemini 3 Flash · Switch to Machoke Machoke has a type advantage against Snorlax and can deal significantly more damage. |
6 | 2.8 s |
| 2 | Haiku 4.5 | Haiku 4.5 · Switch to Geodude Geodude's Rock/Ground typing gives dual super-effective coverage against Lugia (Rock vs Flying, Ground vs Psy… |
6 | 12.7 s |
| 3 | Gemini 3 Flash | Gemini 3 Flash · Use Submission KO Submission has the highest power and a significant chance to knock out the opponent in one hit. |
6 | 4.1 s |
| 4 | Haiku 4.5 | Haiku 4.5 · Use Explosion Explosion guarantees a KO against Machoke while maintaining overall team advantage despite losing Geodude. |
6 | 8.0 s |
| 5 | Haiku 4.5 | Haiku 4.5 · Send out Snorlax forced Snorlax has significantly higher HP (229 vs 153) to better survive Machoke's Fighting-type moves despite the… |
2 | 4.7 s |
| 6 | Gemini 3 Flash | Gemini 3 Flash · Use Vital Throw Vital Throw provides a reliable 2-hit KO against Snorlax with 100% accuracy and no recoil damage. |
6 | 3.2 s |
| 7 | Haiku 4.5 | Haiku 4.5 · Use Body Slam Body Slam deals 84-99 damage to Machoke's 103 HP, nearly or completely eliminating the threat before it can l… |
5 | 8.0 s |
| 8 | Gemini 3 Flash | Gemini 3 Flash · Use Submission KO Submission has normal priority and enough power to KO Snorlax before it can attack Machoke's remaining 10 HP. |
6 | 4.7 s |
| 9 | Haiku 4.5 | Haiku 4.5 · Use Body Slam KO Body Slam deals 84-99 damage to finish off Machoke's 10 HP for the guaranteed KO. |
5 | 6.3 s |
| 10 | Gemini 3 Flash | Gemini 3 Flash · Switch to Lugia forced Lugia is significantly bulkier than Sharpedo and can safely tank Snorlax's hits to finish the battle. |
2 | 2.7 s |
| 11 | Haiku 4.5 | Haiku 4.5 · Send out Glalie forced Switch to Glalie at full health rather than keep Snorlax at 46% HP since the opponent's next Pokémon is unkno… |
2 | 9.4 s |
| 12 | Gemini 3 Flash | Gemini 3 Flash · Switch to Sharpedo Sharpedo resists Glalie's Ice Beam and Crunch, while Lugia is weak to Ice Beam. |
5 | 1.6 s |
| 13 | Haiku 4.5 | Haiku 4.5 · Use Ice Beam Ice Beam deals significantly more damage (66-78 HP) than Crunch (37-44 HP) against Lugia, which is crucial si… |
5 | 4.7 s |
| 14 | Gemini 3 Flash | Gemini 3 Flash · Use Swagger Swagger confuses the foe and forces high self-damage due to the attack boost, which is more effective than Sh… |
5 | 8.7 s |
| 15 | Haiku 4.5 | Haiku 4.5 · Use Ice Beam Ice Beam deals 45-54 damage to Sharpedo's 74 HP, likely KO or severely cripple it to finish the battle quickl… |
5 | 9.8 s |
| 16 | Gemini 3 Flash | Gemini 3 Flash · Use Slash Sharpedo is at low health and Slash provides guaranteed chip damage while Glalie is confused. |
5 | 5.7 s |
| 17 | Haiku 4.5 | Haiku 4.5 · Use Ice Beam KO Ice Beam guarantees KO on the frozen, low-HP Sharpedo to win the battle immediately. |
5 | 4.8 s |
| 18 | Gemini 3 Flash | Gemini 3 Flash · Switch to Lugia forced | 1 | 0 ms |
| 19 | Haiku 4.5 | Haiku 4.5 · Keep Glalie in Glalie is at full health and just won the matchup; keep momentum with the healthy Ice-type attacker. |
2 | 4.5 s |
| 20 | Gemini 3 Flash | Gemini 3 Flash · Use Hydro Pump Hydro Pump deals the most damage to Glalie despite the type disadvantage. |
4 | 4.5 s |
| 21 | Haiku 4.5 | Haiku 4.5 · Use Ice Beam Ice Beam is 2× super effective against Lugia and deals the most damage (66-78), making it the optimal offensi… |
5 | 6.5 s |
| 22 | Gemini 3 Flash | Gemini 3 Flash · Use Recover Lugia is at half health and weak to Ice Beam, so Recovering ensures it can survive the next few turns. |
4 | 5.0 s |
| 23 | Haiku 4.5 | Haiku 4.5 · Use Ice Beam Ice Beam's 66-78 damage will likely KO Lugia's 82 HP before it can use Recover |
5 | 5.1 s |
| 24 | Gemini 3 Flash | Gemini 3 Flash · Use Hydro Pump Hydro Pump deals the most damage to the opponent's Glalie while I have enough HP to sustain an Ice Beam. |
4 | 1.2 s |
| 25 | Haiku 4.5 | Haiku 4.5 · Use Ice Beam Ice Beam deals 66-78 super effective damage against Lugia's 86 HP, likely KOing or nearly KOing it to finish… |
5 | 8.3 s |
| 26 | Gemini 3 Flash | Gemini 3 Flash · Use Recover Lugia is at critical HP and will be knocked out by any attack unless it heals immediately. |
4 | 4.6 s |
| 27 | Haiku 4.5 | Haiku 4.5 · Use Ice Beam Ice Beam KOs Lugia with 66-78 damage against its 10 HP, winning the battle immediately. |
5 | 9.5 s |
| 28 | Gemini 3 Flash | Gemini 3 Flash · Use Recover Lugia's HP is critically low and it needs to heal to survive another hit from Glalie. |
4 | 2.8 s |
| 29 | Haiku 4.5 | Haiku 4.5 · Use Crunch Crunch deals 37-44 damage to Lugia's 10 HP, guaranteeing a KO and winning the battle. |
4 | 5.0 s |
| 30 | Gemini 3 Flash | Gemini 3 Flash · Use Recover Lugia is at low health and needs to Recover to survive an incoming Ice Beam before attempting to finish Glali… |
4 | 3.5 s |
| 31 | Haiku 4.5 | Haiku 4.5 · Use Crunch Crunch does 37-44 damage to Lugia's 44 HP, guaranteeing a KO or near-KO finish. |
4 | 5.0 s |
| 32 | Gemini 3 Flash | Gemini 3 Flash · Use Hydro Pump Hydro Pump deals significant damage and has a high chance to knock out the opponent at its current health. |
4 | 859 ms |
| 33 | Haiku 4.5 | Haiku 4.5 · Use Hail Setting up Hail will deal continuous chip damage to Lugia each turn, gradually wearing it down while its Reco… |
4 | 11.4 s |
| 34 | Gemini 3 Flash | Gemini 3 Flash · Use Gust Gust is 100% accurate and deals enough damage to KO the remaining 22 HP of the foe. |
4 | 3.4 s |
| 35 | Haiku 4.5 | Haiku 4.5 · Switch to Snorlax Glalie is critically low on HP (22/153) and Lugia keeps Recovering; switch to Snorlax's better bulk (105/229… |
4 | 10.9 s |
| 36 | Gemini 3 Flash | Gemini 3 Flash · Use Recover Lugia is at low health and cannot KO Snorlax this turn, so Recovering ensures survival against a potential Bo… |
4 | 4.9 s |
| 37 | Haiku 4.5 | Haiku 4.5 · Use Body Slam Body Slam deals the most damage (39-46) to whittle down Lugia before it Recovers, while hail continues passiv… |
5 | 5.0 s |
| 38 | Gemini 3 Flash | Gemini 3 Flash · Use Recover Lugia is at moderate health and cannot KO Snorlax this turn, so topping off HP with Recover ensures safety ag… |
4 | 6.1 s |
| 39 | Haiku 4.5 | Haiku 4.5 · Use Rollout KO Rollout is 2× super effective against Lugia and deals the most damage (40-48 HP) from available moves, maximi… |
5 | 8.7 s |
| 40 | Gemini 3 Flash | Gemini 3 Flash · Use Hydro Pump Hydro Pump has the highest damage range and is the only move that can potentially KO Snorlax this turn. |
4 | 4.5 s |
| 41 | Gemini 3 Flash | Gemini 3 Flash · Use Hydro Pump Hydro Pump has the highest damage range and the best chance to knock out the low-HP Snorlax this turn. |
4 | 4.5 s |
Every option on every turn
- Gemini 3 Flash: Use Safeguard (status move) · Use Gust · Use Recover (status move) · Use Hydro Pump · Switch to Machoke (hits up to 2×) · Switch to Sharpedo
- Haiku 4.5: Use Body Slam · Use Block (status move) · Use Covet · Use Rollout (2× super effective) · Switch to Geodude (hits up to 2×) · Switch to Glalie (hits up to 2×)
- Gemini 3 Flash: Use Foresight (status move) · Use Revenge (2× super effective) · Use Vital Throw (2× super effective) · Use Submission (2× super effective, may KO) · Switch to Lugia (hits up to 4×, weak to Rock 2×) · Switch to Sharpedo (hits up to 0.5×)
- Haiku 4.5: Use Rock Blast (0.5× not very effective) · Use Earthquake · Use Explosion (KOs) · Use Double Edge · Switch to Snorlax (weak to Fighting 2×) · Switch to Glalie (weak to Fighting 2×)
- Haiku 4.5: Send out Snorlax (weak to Fighting 2×) · Send out Glalie (weak to Fighting 2×)
- Gemini 3 Flash: Use Foresight (status move) · Use Revenge (2× super effective) · Use Vital Throw (2× super effective) · Use Submission (2× super effective) · Switch to Lugia · Switch to Sharpedo
- Haiku 4.5: Use Body Slam · Use Block (status move) · Use Covet · Use Rollout (0.5× not very effective) · Switch to Glalie (weak to Fighting 2×)
- Gemini 3 Flash: Use Foresight (status move) · Use Revenge (2× super effective, may KO) · Use Vital Throw (2× super effective, KOs) · Use Submission (2× super effective, KOs) · Switch to Lugia · Switch to Sharpedo
- Haiku 4.5: Use Body Slam (KOs) · Use Block (status move) · Use Covet (KOs) · Use Rollout (0.5× not very effective, KOs) · Switch to Glalie (weak to Fighting 2×)
- Gemini 3 Flash: Switch to Lugia · Switch to Sharpedo
- Haiku 4.5: Keep Snorlax in · Send out Glalie (weak to Fighting 2×)
- Gemini 3 Flash: Use Safeguard (status move) · Use Gust · Use Recover (status move) · Use Hydro Pump · Switch to Sharpedo (resists Ice)
- Haiku 4.5: Use Protect (status move) · Use Crunch (2× super effective) · Use Ice Beam (2× super effective) · Use Hail (status move) · Switch to Snorlax (hits up to 2×)
- Gemini 3 Flash: Use Screech (status move) · Use Slash · Use Taunt (status move) · Use Swagger (status move) · Switch to Lugia (weak to Ice 2×)
- Haiku 4.5: Use Protect (status move) · Use Crunch (0.5× not very effective) · Use Ice Beam (0.5× not very effective) · Use Hail (status move) · Switch to Snorlax
- Gemini 3 Flash: Use Screech (status move) · Use Slash · Use Taunt (status move) · Use Swagger (status move) · Switch to Lugia (weak to Ice 2×)
- Haiku 4.5: Use Protect (status move) · Use Crunch (0.5× not very effective, may KO) · Use Ice Beam (0.5× not very effective, KOs) · Use Hail (status move) · Switch to Snorlax
- Gemini 3 Flash: Switch to Lugia (weak to Ice 2×)
- Haiku 4.5: Keep Glalie in · Send out Snorlax
- Gemini 3 Flash: Use Safeguard (status move) · Use Gust · Use Recover (status move) · Use Hydro Pump
- Haiku 4.5: Use Protect (status move) · Use Crunch (2× super effective) · Use Ice Beam (2× super effective) · Use Hail (status move) · Switch to Snorlax (hits up to 2×)
- Gemini 3 Flash: Use Safeguard (status move) · Use Gust · Use Recover (status move) · Use Hydro Pump
- Haiku 4.5: Use Protect (status move) · Use Crunch (2× super effective) · Use Ice Beam (2× super effective) · Use Hail (status move) · Switch to Snorlax (hits up to 2×)
- Gemini 3 Flash: Use Safeguard (status move) · Use Gust · Use Recover (status move) · Use Hydro Pump
- Haiku 4.5: Use Protect (status move) · Use Crunch (2× super effective) · Use Ice Beam (2× super effective) · Use Hail (status move) · Switch to Snorlax (hits up to 2×)
- Gemini 3 Flash: Use Safeguard (status move) · Use Gust · Use Recover (status move) · Use Hydro Pump
- Haiku 4.5: Use Protect (status move) · Use Crunch (2× super effective, KOs) · Use Ice Beam (2× super effective, KOs) · Use Hail (status move) · Switch to Snorlax (hits up to 2×)
- Gemini 3 Flash: Use Safeguard (status move) · Use Gust · Use Recover (status move) · Use Hydro Pump
- Haiku 4.5: Use Protect (status move) · Use Crunch (2× super effective, KOs) · Use Hail (status move) · Switch to Snorlax (hits up to 2×)
- Gemini 3 Flash: Use Safeguard (status move) · Use Gust · Use Recover (status move) · Use Hydro Pump
- Haiku 4.5: Use Protect (status move) · Use Crunch (2× super effective, may KO) · Use Hail (status move) · Switch to Snorlax (hits up to 2×)
- Gemini 3 Flash: Use Safeguard (status move) · Use Gust · Use Recover (status move) · Use Hydro Pump
- Haiku 4.5: Use Protect (status move) · Use Crunch (2× super effective) · Use Hail (status move) · Switch to Snorlax (hits up to 2×)
- Gemini 3 Flash: Use Safeguard (status move) · Use Gust (KOs) · Use Recover (status move) · Use Hydro Pump (KOs)
- Haiku 4.5: Use Protect (status move) · Use Crunch (2× super effective) · Use Hail (status move) · Switch to Snorlax (hits up to 2×)
- Gemini 3 Flash: Use Safeguard (status move) · Use Gust · Use Recover (status move) · Use Hydro Pump
- Haiku 4.5: Use Body Slam · Use Block (status move) · Use Covet · Use Rollout (2× super effective) · Switch to Glalie (hits up to 2×)
- Gemini 3 Flash: Use Safeguard (status move) · Use Gust · Use Recover (status move) · Use Hydro Pump
- Haiku 4.5: Use Body Slam · Use Block (status move) · Use Covet · Use Rollout (2× super effective) · Switch to Glalie (hits up to 2×)
- Gemini 3 Flash: Use Safeguard (status move) · Use Gust · Use Recover (status move) · Use Hydro Pump (may KO)
- Gemini 3 Flash: Use Safeguard (status move) · Use Gust · Use Recover (status move) · Use Hydro Pump (may KO)
Harness 2159ee4a4+local changes (harness.diff). Still frames from our own run; no game files are hosted here.